

-
About BrakeHengshui Brake Hose Machinery Co., Ltd. is located within the Beijing-Kowloon, Beijing-Shanghai, and Shide lines. There is Shihuang Expressway in the north and Hengshui Lake tourist attraction in the south. The environment is beautiful and the geographical location is superior.

-
ProductsThe main production of automobile, motorcycle brake hose, brake steel hose, Teflon brake hose, nylon brake hose, excellent product quality and performance, by the majority of users alike.
-
NewsThe company with sophisticated equipment, advanced technology, high-quality staff, to user requirements for the purpose, warmly welcome new and old users at home and abroad to visit and guide.
DIY Guide: Replacing Your Motorcycle Brake Hose Step by Step
2026-08-14
DIY Guide: Replacing Your Motorcycle Brake Hose Step by Step
Table of Contents
- 1. Introduction to Motorcycle Brake Hoses
- 2. Importance of Replacing Your Brake Hose
- 3. Essential Tools for Brake Hose Replacement
- 4. Preparing for the Replacement
- 5. Step-by-Step Removal of Old Brake Hose
- 6. Installing the New Brake Hose
- 7. Bleeding the Brake System
- 8. Final Inspection and Testing
- 9. Frequently Asked Questions
- 10. Conclusion
1. Introduction to Motorcycle Brake Hoses
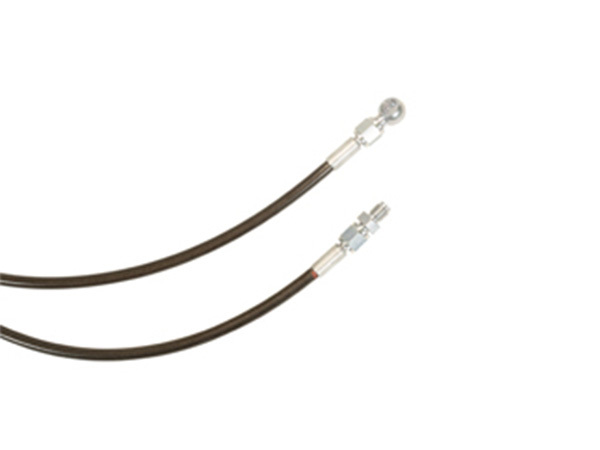
Motorcycle brake hoses are a critical component of your bike's braking system, designed to transfer brake fluid from the master cylinder to the brake calipers. Over time, these hoses can wear out due to exposure to heat, moisture, and various environmental factors. Understanding the anatomy and function of these hoses will prepare you for the task at hand.
2. Importance of Replacing Your Brake Hose
Ignoring the condition of your brake hose can lead to severe safety hazards. A compromised hose can cause brake fluid leaks, resulting in reduced braking performance. By replacing your brake hose regularly, you ensure that your motorcycle remains safe and reliable. Moreover, it helps to maintain optimal braking efficiency, which is vital for your safety on the road.
3. Essential Tools for Brake Hose Replacement
Before diving into the replacement process, gather the necessary tools:
- **Socket set**: For removing bolts and fittings.
- **Wrenches**: To loosen and tighten connections.
- **Pliers**: Useful for gripping and pulling.
- **Brake fluid**: Ensure it is the type recommended for your motorcycle.
- **Rags**: For cleaning up spills and excess fluid.
- **Safety goggles and gloves**: Protect yourself during the process.
Having the right tools at hand will make the replacement process smoother and more efficient.
4. Preparing for the Replacement
Preparation is key to a successful brake hose replacement. First, ensure your motorcycle is on a stable surface and the key is removed from the ignition.
1. **Check the owners' manual**: Familiarize yourself with your motorcycle's specific brake system.
2. **Gather your materials**: Make sure you have the new brake hose and all necessary tools ready before starting the replacement.
3. **Inspect the surrounding components**: Look for any other potential issues, such as damaged cables or leaky seals, that might need attention.
5. Step-by-Step Removal of Old Brake Hose
Removing the old brake hose is a crucial part of the replacement process. Follow these steps carefully:
1. **Locate the brake hose**: Identify where the brake hose connects to the master cylinder and brake calipers.
2. **Loosen the connections**: Using the appropriate wrench, carefully loosen the fittings on both ends of the hose. Be prepared for some brake fluid to leak out during this process.
3. **Remove the hose**: Once loose, gently pull the hose away from the connections. Ensure that you have a rag handy to catch any remaining fluid.
4. **Inspect the old hose**: Before disposing of it, check for signs of wear or damage, which can inform future maintenance.
6. Installing the New Brake Hose
With the old hose removed, it’s time to install the new one. Follow these steps:
1. **Position the new hose**: Align the new brake hose with the master cylinder and brake calipers.
2. **Secure the connections**: Hand-tighten the fittings first, and then use the wrench to secure them without over-tightening. Remember, over-tightening can damage the fittings or the hose.
3. **Ensure the hose is routed correctly**: Make sure the hose does not come into contact with any moving parts or hot surfaces.
7. Bleeding the Brake System
After installing the new brake hose, it’s essential to bleed the brake system to remove any air pockets. Air in the system can severely reduce braking efficiency. Here’s how to do it:
1. **Locate the bleed valve**: This is typically found on the brake caliper.
2. **Attach a clear tube**: Connect a clear plastic tube to the bleed valve and place the other end in a container to catch the fluid.
3. **Pump the brake lever**: Gently pull the brake lever several times and hold it.
4. **Open the bleed valve**: While holding the lever, open the bleed valve slightly. Watch for fluid and air bubbles to escape through the tube.
5. **Close the valve**: Once the bubbles stop, close the valve and release the lever. Repeat this process until no more bubbles appear.
6. **Check fluid levels**: Ensure the brake fluid reservoir is topped off as you work.
8. Final Inspection and Testing
Once everything is reassembled, conduct a thorough inspection:
1. **Check for leaks**: Inspect all connections for any signs of leaking fluid.
2. **Test the brake lever**: Pull the brake lever to ensure it feels firm and responsive. If it feels spongy, you may need to bleed the system again.
3. **Perform a test ride**: Take your motorcycle for a short ride in a safe area to ensure the brakes are functioning correctly.
9. Frequently Asked Questions
Q1: How often should I replace my motorcycle brake hose?
A1: It is advisable to replace your motorcycle brake hose every 2-4 years, depending on usage and environmental conditions. Always check for wear and tear regularly.
Q2: What signs indicate that my brake hose needs to be replaced?
A2: Look for signs such as cracks, bulges, leaks, or a spongy brake lever. Any of these indications signal that a replacement is necessary.
Q3: Can I use any brake fluid for my motorcycle?
A3: No, you should always use the type of brake fluid specified in your motorcycle’s manual. Using the wrong fluid can damage the braking system.
Q4: Is it safe to replace the brake hose myself?
A4: Yes, as long as you follow the proper procedures and take necessary safety precautions. If you're unsure, consider seeking professional help.
Q5: What tools do I need for this replacement?
A5: Essential tools include a socket set, wrenches, pliers, brake fluid, rags, and safety equipment like goggles and gloves.
10. Conclusion
Replacing your motorcycle brake hose is a critical maintenance task that enhances your safety and ensures optimal performance. By following this comprehensive guide, you can confidently tackle the replacement on your own. Regular inspections and timely replacements will keep your motorcycle's braking system in top shape, allowing you to enjoy a safe and exhilarating ride. Remember, your motorcycle is an extension of yourself—keeping it well-maintained is an investment in your safety and freedom on the road.
Key words:
Recommended News
Comparing Different Materials Used in Color Modified Brake Hoses
Comparing Different Materials Used in Color Modified Brake Hoses
Table of Contents
1. Introduction to Brake Hoses and Their Importance
2. What Are Brake Hoses?
3. Importance of Materials in Brake Hoses
4. Common Materials Used in Color Modified Brake Hoses
4.1 Rubber
4.2 Polyurethane
4.3 Nylon
4.4 Stainless Steel


Contact Us
+86-15369891688 (same as WeChat)
Xikang Industrial Zone, 4889 Renmin West Road, Taocheng District, Hengshui City
online message