

-
About BrakeHengshui Brake Hose Machinery Co., Ltd. is located within the Beijing-Kowloon, Beijing-Shanghai, and Shide lines. There is Shihuang Expressway in the north and Hengshui Lake tourist attraction in the south. The environment is beautiful and the geographical location is superior.

-
ProductsThe main production of automobile, motorcycle brake hose, brake steel hose, Teflon brake hose, nylon brake hose, excellent product quality and performance, by the majority of users alike.
-
NewsThe company with sophisticated equipment, advanced technology, high-quality staff, to user requirements for the purpose, warmly welcome new and old users at home and abroad to visit and guide.
A Step-by-Step Guide to Replacing Your Motorcycle Brake Oil Pipe Joint Fisheye Joint
2026-08-21
A Step-by-Step Guide to Replacing Your Motorcycle Brake Oil Pipe Joint Fisheye Joint
Table of Contents
- Introduction to Motorcycle Brake Oil Pipe Joint Replacement
- Understanding Fisheye Joints in Brake Systems
- Why You Should Replace Your Motorcycle Brake Oil Pipe Joint
- Essential Tools and Materials for the Job
- Safety First: Precautions Before You Start
- Step-by-Step Replacement Process
- Draining the Brake Fluid
- Removing the Old Fisheye Joint
- Installing the New Fisheye Joint
- Refilling the Brake Fluid
- Testing the Brake System
- Maintenance Tips for Longevity
- Frequently Asked Questions (FAQs)
- Conclusion
Introduction to Motorcycle Brake Oil Pipe Joint Replacement
Replacing the brake oil pipe joint, commonly known as the fisheye joint, is a crucial maintenance task for motorcycle owners. The brake system is vital for ensuring your safety on the road, and any issues with the brake oil pipe can lead to dangerous situations. In this guide, we will walk you through the entire process of replacing your motorcycle brake oil pipe joint, equipping you with the knowledge to perform this task effectively.
Understanding Fisheye Joints in Brake Systems
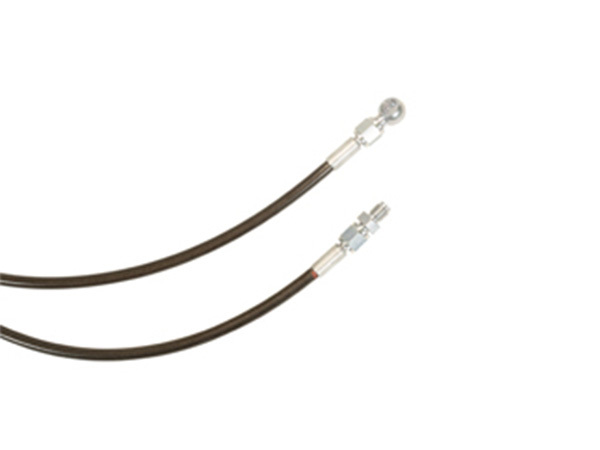
The fisheye joint is a critical component in your motorcycle's braking system. It connects the brake line to the brake caliper and is designed to allow for flexibility and movement as the suspension compresses and decompresses. This flexibility ensures that the brake line does not become stressed or kinked, which can lead to brake fluid leaks and reduced braking performance.
Over time, fisheye joints can wear out due to environmental factors such as moisture, dirt, and road debris. Regular inspection and replacement of these joints are essential to maintain optimal braking performance and safety.
Why You Should Replace Your Motorcycle Brake Oil Pipe Joint
There are several compelling reasons to replace your motorcycle's brake oil pipe joint.
1. **Safety**: A failing fisheye joint can lead to brake fluid leaks, resulting in decreased braking power and potentially catastrophic accidents.
2. **Performance**: Fresh joints ensure that your brake system operates at peak efficiency, allowing for responsive braking.
3. **Preventive Maintenance**: Regularly replacing worn components can save you money in the long run by preventing extensive brake system repairs.
Essential Tools and Materials for the Job
Before beginning the replacement process, ensure you have the following tools and materials:
- **Tools**:
- Wrenches (metric and standard sizes)
- Torque wrench
- Pliers
- Brake line cutter
- Screwdrivers (flat and Phillips)
- Brake bleeding kit
- Allen keys
- **Materials**:
- New fisheye joint
- Brake fluid (compatible with your motorcycle)
- Sealant or thread tape (if required)
- Cleaning rags
Safety First: Precautions Before You Start
Ensuring your safety while working on your motorcycle is paramount. Follow these precautions:
- **Wear Protective Gear**: Always wear gloves and safety glasses to protect against brake fluid, which can be corrosive.
- **Work in a Safe Environment**: Choose a level surface with adequate lighting and ventilation.
- **Use a Stand**: Ensure your motorcycle is on a stable stand to prevent it from falling during the repair process.
Step-by-Step Replacement Process
Replacing the motorcycle brake oil pipe joint can be straightforward when following these steps carefully.
Draining the Brake Fluid
1. **Locate the Brake Reservoir**: Identify the brake fluid reservoir on your motorcycle.
2. **Open the Reservoir Cap**: Carefully remove the cap to release pressure and allow fluid to drain.
3. **Drain the Fluid**: Using a clean container, drain the brake fluid from the system by opening the bleeder valve on the brake caliper.
Removing the Old Fisheye Joint
1. **Disconnect the Brake Line**: Use the appropriate wrench to loosen and disconnect the brake line from the old fisheye joint.
2. **Remove the Joint**: Carefully unscrew the fisheye joint, being cautious not to damage surrounding components.
Installing the New Fisheye Joint
1. **Prepare the New Joint**: Apply sealant or thread tape to the threads of the new fisheye joint, if necessary.
2. **Screw in the New Joint**: Hand-tighten the new fisheye joint into place, then use a torque wrench to tighten it to the manufacturer’s specifications.
3. **Reconnect the Brake Line**: Attach the brake line to the new joint, ensuring a firm connection.
Refilling the Brake Fluid
1. **Refill the Reservoir**: Pour new brake fluid into the reservoir until it reaches the appropriate level.
2. **Bleed the Brakes**: Use a brake bleeding kit to remove any air bubbles from the brake line, ensuring a responsive braking system.
Testing the Brake System
1. **Check for Leaks**: Inspect all connections for any signs of fluid leaks.
2. **Test the Brakes**: Before riding, squeeze the brake lever to ensure proper resistance and responsiveness.
Maintenance Tips for Longevity
To ensure the longevity of your motorcycle brake oil pipe joints, consider the following maintenance tips:
- **Regular Inspections**: Frequently check the condition of your fisheye joints and brake lines for signs of wear.
- **Flush Brake Fluid**: Change your brake fluid as recommended by the manufacturer to prevent moisture buildup.
- **Keep it Clean**: Regularly clean your motorcycle’s braking components to prevent dirt and grime from causing wear.
Frequently Asked Questions (FAQs)
1. How often should I replace the fisheye joint?
It’s recommended to inspect fisheye joints during routine maintenance and replace them every 2-3 years or if signs of wear are evident.
2. Can I replace the fisheye joint without professional help?
Yes, with proper tools and safety precautions, this task can be performed by skilled DIYers.
3. What type of brake fluid should I use?
Always refer to your motorcycle’s owner manual for the recommended brake fluid type, whether it’s DOT 3, DOT 4, or another specification.
4. How do I know if my brake oil pipe joint is failing?
Signs include brake fluid leaks, a spongy brake lever, or decreased braking performance.
5. Is it necessary to bleed the brakes after replacing the fisheye joint?
Yes, bleeding the brakes is crucial to remove any air trapped in the brake lines, ensuring optimal brake function.
Conclusion
Replacing your motorcycle brake oil pipe joint (fisheye joint) is a vital maintenance task that enhances your motorcycle's safety and performance. By following this comprehensive step-by-step guide, you can confidently undertake this replacement, ensuring that your brakes operate efficiently and reliably. Remember to perform regular maintenance and inspections to keep your motorcycle in top condition and enjoy a safe riding experience.
Key words:
Recommended News
Comparing Different Materials Used in Color Modified Brake Hoses
Comparing Different Materials Used in Color Modified Brake Hoses
Table of Contents
1. Introduction to Brake Hoses and Their Importance
2. What Are Brake Hoses?
3. Importance of Materials in Brake Hoses
4. Common Materials Used in Color Modified Brake Hoses
4.1 Rubber
4.2 Polyurethane
4.3 Nylon
4.4 Stainless Steel


Contact Us
+86-15369891688 (same as WeChat)
Xikang Industrial Zone, 4889 Renmin West Road, Taocheng District, Hengshui City
online message